Search This Blog

Showing posts with label summer. Show all posts

Tuesday, July 19, 2011

Year-round Flowers to Enjoy

Well, my flowers are dry, and so I took them out of the book.  They didn't all turn out like I had hoped, but quite a few of them look very nice.  Unfortunately, the whole crinum lily I tried didn't work at all.  I think it would have been better if I had taken it apart and just used the petals.

Here is what I ended up with:

When I was in high school, a lady that I went to church with taught me how to make designs with pressed flowers.  I also found a lady at the Kanapaha Botanical Garden Show one year that makes beautiful designs, like landscapes and faces using only pressed flowers and leaves.  

This is what I do:

You will need paper, glue, scissors or a paper cutter, and clear contact paper.  You can use the Contact brand if you have some, but I prefer another product.

 My mom used to have the best contact paper for this, and I used it all.  I hadn't seen any more for years.  I looked online, in stores--nothing.  But, my husband suggested Central Florida Office Supply, and there it was.  This is better than the Contact brand for a few reasons.  First, it is completely clear.  Second, it is cheaper.  I was able to buy it by the sheet, so  I only paid for as much as I needed.

In case you are not in Gainesville, I took a picture of the logo on the contact paper so that you could find a supplier in your area.


I used white cardstock for this project, because it is inexpensive.  However, it is nice to have a pretty background for your design.  You can use chalks to color your paper.  I chose to use watercolor pencils.


I shaded a background with the pencils,


and then went over it with water to blend the pencil marks.


After the paper dried, I used my paper cutter to cut a rectangle out of the painted area of my paper.


Now, it is time to arrange the flowers.  These are individual petals and leaves arranged together to make a picture.  You do not have to, but it makes it easier if you use a dab of glue to attach each piece to the paper.  I used cheap "school glue."


Cut your contact paper to size.


Peel off the backing and attach it to the paper background.  It helps to start in the middle, or at one end and smooth it down as you go.


I had trouble getting my contact paper to be just the right size, so after I stuck it down, I had to go back and trim the edges.  This is okay.  Nothing has to be perfect.

 I designed this to be a bookmark, so I used a hole-punch in the middle of the top section.


I cut a piece of ribbon (6-8 inches) to thread through the hole.  Double the ribbon and pass the "loop" end through the hole.  Thread the two ends through the loop and pull the two ends tight.  


Here you are!  You could add this to a card, or make it a card by putting a personal message on the back.


The second thing you could do is make a picture, using the flowers and leaves as objects.  The picture I got at the garden show has hot air balloons.

To start, make your background as before, but bigger.


Cut it to the size you want,


and arrange your flowers.

The brown-eyed susan reminded me of a sun, and leaves make great trees.  I made the butterfly out of five flower petals.  

Glue the pieces down, cut your contact paper to size, lay it over your design, and trim the edges.


This is something that you could do with kids, too.  Go out, identify flowers, pick them, and dry them, and then the kids can have a great time coloring backgrounds and arranging scenes with the flowers.  You can do the contact paper part for them, and they can give them to grandparents!

Leave a comment if you try my ideas, or better yet, email me a picture!  I love feedback:)

Saturday, July 9, 2011

A post with three titles: Pressed Flowers or I have a new website! or I have a business now!

Well, my cyber friends, I have been very busy in the past few days.  Tommy and I did receive our paper work from the state and the city, and so we are now officially in business.  We now have a company called Redding Creative Arts, offering photography and custom scrapbooking services.  If you have a minute, you can check out our site, http://www.wix.com/reddingcreativearts/home.

I also had time to get some flowers and press them.  Why?  Well, pressed flowers make lovely bookmarks, greeting cards, and art.  My mom and I found an artist that makes pictures only using pressed flowers and leaves.  I have a scene of hot air balloons flying over woods.  You can do something just as pretty, and for very little cost.  Pressing the flowers is the first step, and as long as you don't get arrested for stealing flowers from people's yards, it is pretty much free!

To begin, collect some flowers and leaves.  The leaves are important, please don't forget them.


Then, you will need some white paper or tissues.  You are going to flatten the flowers, but it is important to remember this as you lay the flowers out.  Try to get the petals as open as possible.  You may have to separate petals from the more elaborate flowers.  Arrange the flowers on the white paper so that they do not overlap.  


Next, lay another sheet of paper or tissue over the top of the flowers.  You may need to gently flatten this some.  

Put your "flower sandwich" into a book to press, and stack other books or heavy objects on top of it.  I used this particular book because it had large pages.  I paid 10 cents for it and it was water-damaged when I got it.  If the flowers get it a little bit damp, it won't make much of a difference.  If you do not have such a book, I have this suggestion:  Put your "flower sandwiches" in newspaper, and put the newspaper under a stack of books.


You should check the flowers after about a week to see if they are dry.  If they are, take them out and store them in a dry place.  Sandwich bags work nicely.

A few words about drying flowers:  You should try drying things that you like, but throw in a few odd things, too.  You never know how you will be able to use them in your pressed flower designs later.  Also, colors change as the flowers dry out, and sometimes after a flower is dry, it does not look as pretty as you thought it would.  Don't stress over the ones that don't work.  That is part of the reason why trying odd things is important.  As flowers change, you may find that you like the result.  White flowers may turn a bit brown as they dry, and flowers that are more moist will dry differently than flowers with drier petals.  Experiment!  It's fun!

Next week, when my flowers are dry, I'll show you some ideas on how to use them.  


Thursday, June 30, 2011

Nuts!

 Since I don't live in Dothan, AL, I cannot tell you that I live in the peanut capital of the world.  However, the peanut festival is one of the centerpieces of our town's existence, and we like boiled peanuts.  Some of our friends have an annual peanut boil, and in honor of that, I made these sweet treats.   My husband, Tommy, came up with the recipe, and I made them.  People loved them, and at least one person came up to me and said, "I hope you don't mind, but I packed a few of these to take with me."

The idea for these started off with cake pops, which I learned about from a lovely book by Bakerella, called Cake Pops.  I decided to try them, and they were great.  You can buy some overpriced ones at Starbucks if you really want to see some.  There are recipes on the internet, too.

This is our take on cake pops:

You will need to start with a cake.  I used a Devil's food mix, and followed the instructions on the box.


Then, trim the edges off of your cake.  If you use a light cake color (like white, pink, or yellow), you will need to cut off the top and bottom as well as the edges. 


  Next, it is time to crumble the cake.  The nice part of this is that it doesn't matter what your original cake looked like, because you are turning it into crumbs anyway.  Take a section of the cake and break it in half and rub the two together.  Some people have suggested using a food processor, but I just use my hands.  At the end, you should have a bowl of fine crumbs.


 The best part of this is possibly the peanut butter.  You can use any brand you like.

Add 8 to 12 oz. (1 to 1 1/2 cups) of peanut butter to the cake crumbs.  The amount is mostly according your taste.  I mixed in about a cup and the batter was fine as far as consistency, but I didn't think it had enough peanut taste, and so I added some more.


To mix the batter, you can start with a spoon, but the only way to really do this is to use your hands.  


Mush the crumbs and peanut butter together until it makes a stiff batter, like cookie dough.   


You will need something to hold your little cake balls after you make them.  I used tupperware, but cookie sheets  or plates are fine.  You will probably want something with a raised edge to keep the little cakes from rolling off when you move the pan.


Take some batter and roll it into a 1 inch ball.


Then, squeeze the middle of the ball to make a peanut shape.  As you mold your batter, cracks will form.  Try to smooth these out as best as you can.  Small cracks aren't a problem, but deep ones will show through the candy coating.


 Keep it up until you use up all your batter.  I ended up with about 48 peanuts, although if you don't sample them while you're making them, you may have a few more!


 These will need to be refrigerated for a few hours.  I usually do them overnight.  You can put them in the freezer to speed up the process.

Once your peanuts are chilled, they need to be coated with candy.  You can buy Candy Melts to do this, but for white candy, I found that almond bark was much cheaper.  I used the almond bark (which doesn't have almonds in it, by the way) for a base and then used some Wilton Candy Melts (which you can get at Michaels or sometimes Walmart) to tint the candy to the color I wanted.


I have a "Little Dipper" crock pot that I use to melt my candy.  If you do not have one of these, you can use the microwave.  (You could also make a double boiler by boiling water in a sauce pan and putting a glass mixing bowl on the top of the pot. Put the candy in the bowl and it will melt.  Just be careful of the steam escaping around the bowl.)


 Once the white candy was melted, I added some of the chocolate.  I finally ended up using 3 chocolate candy melts for each block of almond bark I used.  The result should be a tan color.  You will want your candy to be in a container that is 2-3 inches deep (or more) for dipping.


 Notes:  1.  Previously, I tried using tint for icing to color my candy instead of buying the colored candy melts.  This does not work very well, which is why I bought the chocolate.  2.  I started running out of the candy in the middle of my project, and when I mixed the new batch, it was a slightly different color.  It didn't make a difference in the long run, but it bugged me.  You might want to melt more candy than you think you will need to make sure than you don't have to make more in the middle.  You can refrigerate any extra candy you have and use it for another project later.  3.  Also, if you do use the crock pot, if you have it on for more than an hour, you will want to unplug it for a little while to prevent the candy from overheating.


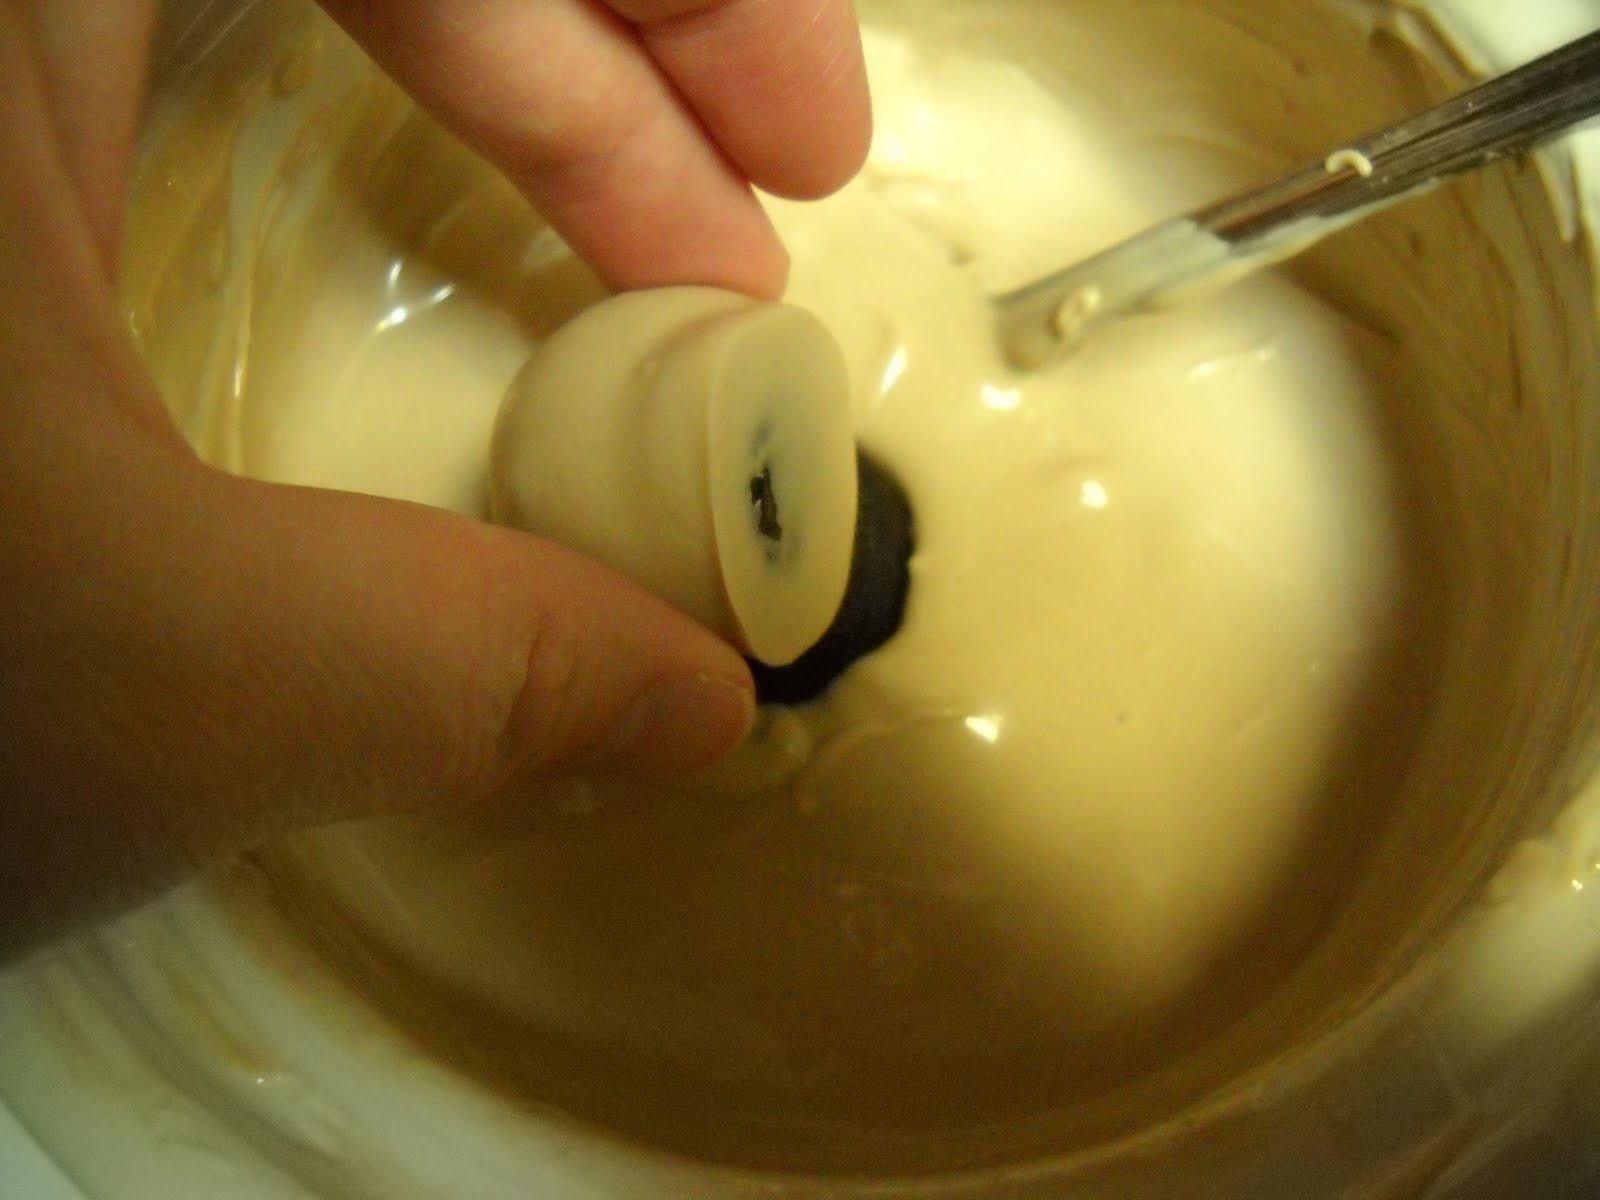
Now, it is time to take your chilled peanuts and dip them in the candy.  After several frustrating experiments, this is the best way I found to do this.  One at a time, dip your peanut shapes just past halfway into the melted candy.  Allow some of the candy to drip back into the pot.


Lay each peanut on wax or parchment paper so that the candy can harden.


Once the shell is hard, pick up each peanut by the candy coated side and dip the other side into the candy.  When you put it back on the wax paper, make sure to lay the same side down on the paper so that the top will be smooth.


 If your little cakes become too warm before you finish dipping them, they may break in half when you stick them in the candy.  If this happens, enjoy the broken ones, and stick the unfinished cakes back in the refrigerator for about 20 minutes.  Don't worry if a few of them break.  Sometimes that just happens, even if they are chilled.  I just eat those myself ;)

Last step:  Decorating.

If you have candy decorating or icing bags, you can use one of those.  If not, plastic sandwich bags will work--just be careful because the plastic bag may break if you squeeze it too hard.

Take some chocolate candy melts and put them in the bag.  There are directions on the package for microwaving them to melt them.


After the candy is melted, cut a very small hole in the tip of the bag to allow the chocolate to come out.  To let you know how small of a hole I used, the first one I cut was so small the chocolate couldn't even squeeze through, so I made the hole just a teeny bit bigger.

Squeeze the melted chocolate into horizontal and then vertical lines across the peanuts to make a grid.  At first, I tried making individual lines, but that was very time consuming and it didn't seem to be as smooth as I wanted it.  I tried moving faster and just making curves at the end of the line and my chocolate worked better.  The connected lines didn't take away from the design.


Once the chocolate lines dry, they are ready to serve.  They do not have to be refrigerated, but if you leave them in the sun, they will melt.

I put mine on serving dishes and sprinkled on some roasted peanuts as a garnish.  They were worth the effort!


Enjoy!