Search This Blog

Showing posts with label Cake. Show all posts

Thursday, June 30, 2011

Nuts!

 Since I don't live in Dothan, AL, I cannot tell you that I live in the peanut capital of the world.  However, the peanut festival is one of the centerpieces of our town's existence, and we like boiled peanuts.  Some of our friends have an annual peanut boil, and in honor of that, I made these sweet treats.   My husband, Tommy, came up with the recipe, and I made them.  People loved them, and at least one person came up to me and said, "I hope you don't mind, but I packed a few of these to take with me."

The idea for these started off with cake pops, which I learned about from a lovely book by Bakerella, called Cake Pops.  I decided to try them, and they were great.  You can buy some overpriced ones at Starbucks if you really want to see some.  There are recipes on the internet, too.

This is our take on cake pops:

You will need to start with a cake.  I used a Devil's food mix, and followed the instructions on the box.


Then, trim the edges off of your cake.  If you use a light cake color (like white, pink, or yellow), you will need to cut off the top and bottom as well as the edges. 


  Next, it is time to crumble the cake.  The nice part of this is that it doesn't matter what your original cake looked like, because you are turning it into crumbs anyway.  Take a section of the cake and break it in half and rub the two together.  Some people have suggested using a food processor, but I just use my hands.  At the end, you should have a bowl of fine crumbs.


 The best part of this is possibly the peanut butter.  You can use any brand you like.

Add 8 to 12 oz. (1 to 1 1/2 cups) of peanut butter to the cake crumbs.  The amount is mostly according your taste.  I mixed in about a cup and the batter was fine as far as consistency, but I didn't think it had enough peanut taste, and so I added some more.


To mix the batter, you can start with a spoon, but the only way to really do this is to use your hands.  


Mush the crumbs and peanut butter together until it makes a stiff batter, like cookie dough.   


You will need something to hold your little cake balls after you make them.  I used tupperware, but cookie sheets  or plates are fine.  You will probably want something with a raised edge to keep the little cakes from rolling off when you move the pan.


Take some batter and roll it into a 1 inch ball.


Then, squeeze the middle of the ball to make a peanut shape.  As you mold your batter, cracks will form.  Try to smooth these out as best as you can.  Small cracks aren't a problem, but deep ones will show through the candy coating.


 Keep it up until you use up all your batter.  I ended up with about 48 peanuts, although if you don't sample them while you're making them, you may have a few more!


 These will need to be refrigerated for a few hours.  I usually do them overnight.  You can put them in the freezer to speed up the process.

Once your peanuts are chilled, they need to be coated with candy.  You can buy Candy Melts to do this, but for white candy, I found that almond bark was much cheaper.  I used the almond bark (which doesn't have almonds in it, by the way) for a base and then used some Wilton Candy Melts (which you can get at Michaels or sometimes Walmart) to tint the candy to the color I wanted.


I have a "Little Dipper" crock pot that I use to melt my candy.  If you do not have one of these, you can use the microwave.  (You could also make a double boiler by boiling water in a sauce pan and putting a glass mixing bowl on the top of the pot. Put the candy in the bowl and it will melt.  Just be careful of the steam escaping around the bowl.)


 Once the white candy was melted, I added some of the chocolate.  I finally ended up using 3 chocolate candy melts for each block of almond bark I used.  The result should be a tan color.  You will want your candy to be in a container that is 2-3 inches deep (or more) for dipping.


 Notes:  1.  Previously, I tried using tint for icing to color my candy instead of buying the colored candy melts.  This does not work very well, which is why I bought the chocolate.  2.  I started running out of the candy in the middle of my project, and when I mixed the new batch, it was a slightly different color.  It didn't make a difference in the long run, but it bugged me.  You might want to melt more candy than you think you will need to make sure than you don't have to make more in the middle.  You can refrigerate any extra candy you have and use it for another project later.  3.  Also, if you do use the crock pot, if you have it on for more than an hour, you will want to unplug it for a little while to prevent the candy from overheating.


Now, it is time to take your chilled peanuts and dip them in the candy.  After several frustrating experiments, this is the best way I found to do this.  One at a time, dip your peanut shapes just past halfway into the melted candy.  Allow some of the candy to drip back into the pot.


Lay each peanut on wax or parchment paper so that the candy can harden.


Once the shell is hard, pick up each peanut by the candy coated side and dip the other side into the candy.  When you put it back on the wax paper, make sure to lay the same side down on the paper so that the top will be smooth.
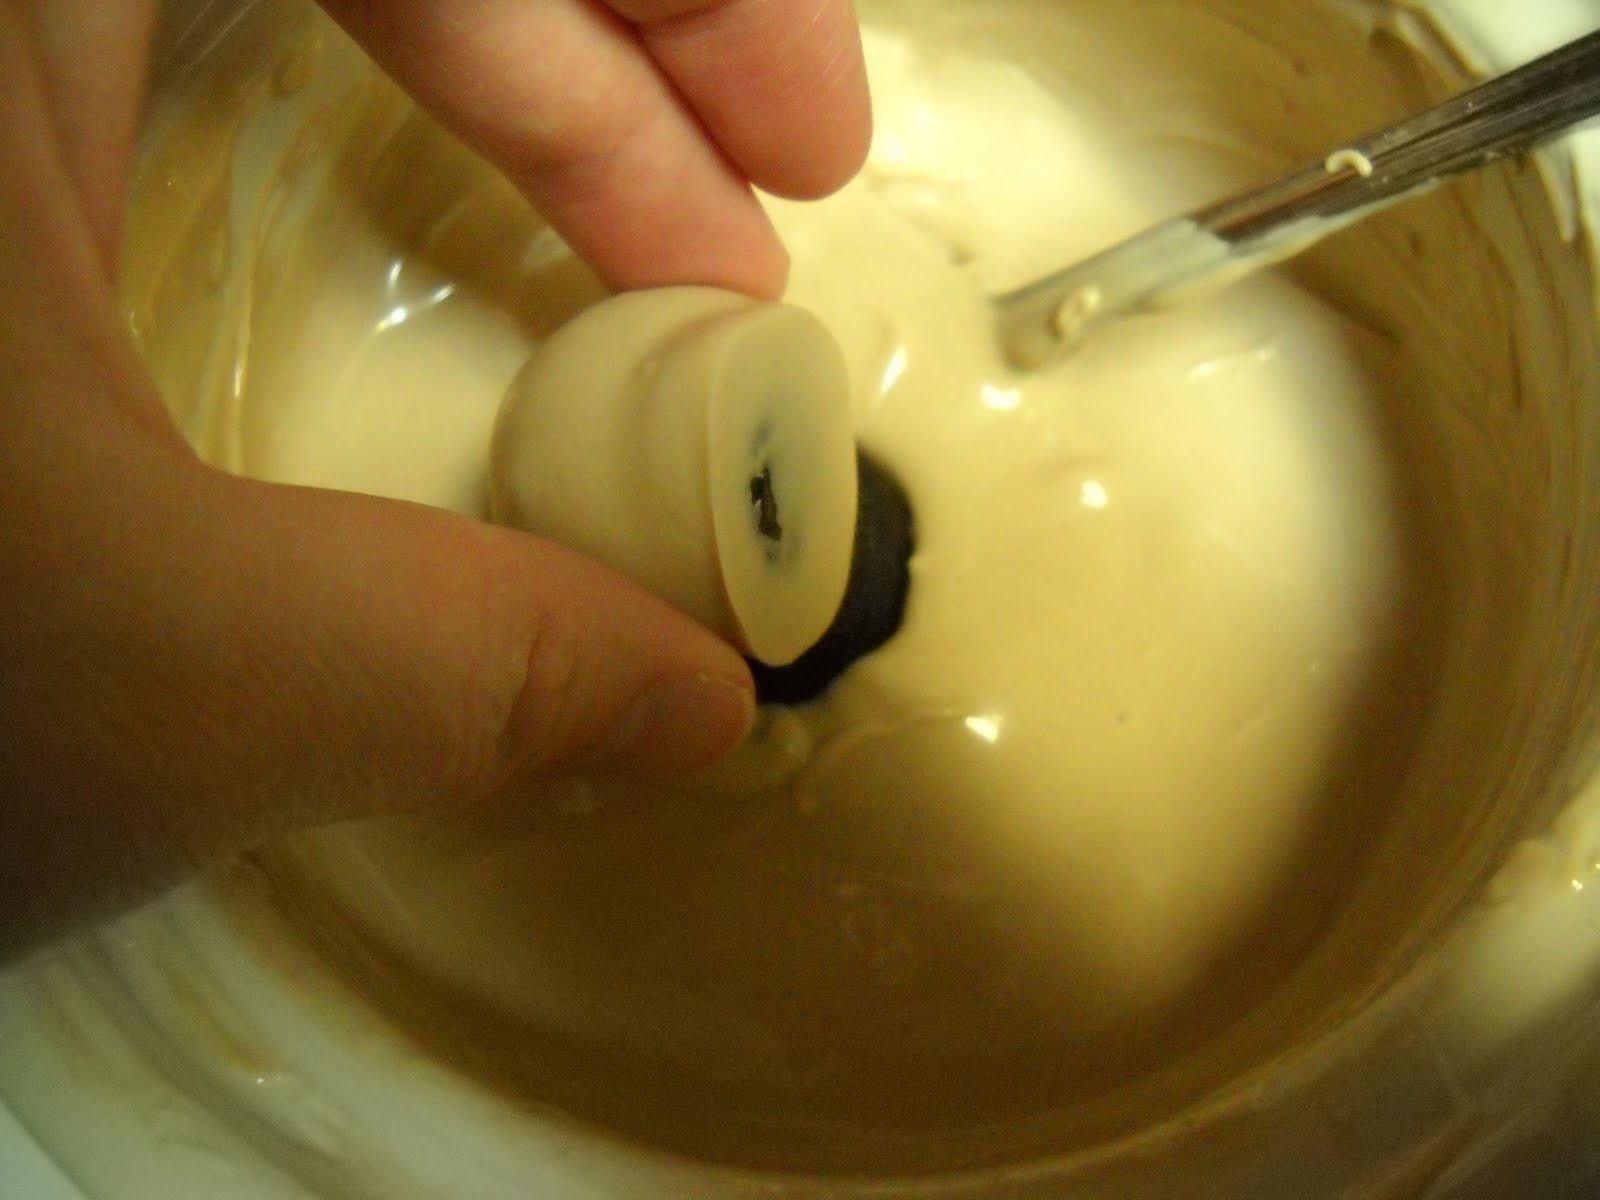


 If your little cakes become too warm before you finish dipping them, they may break in half when you stick them in the candy.  If this happens, enjoy the broken ones, and stick the unfinished cakes back in the refrigerator for about 20 minutes.  Don't worry if a few of them break.  Sometimes that just happens, even if they are chilled.  I just eat those myself ;)

Last step:  Decorating.

If you have candy decorating or icing bags, you can use one of those.  If not, plastic sandwich bags will work--just be careful because the plastic bag may break if you squeeze it too hard.

Take some chocolate candy melts and put them in the bag.  There are directions on the package for microwaving them to melt them.


After the candy is melted, cut a very small hole in the tip of the bag to allow the chocolate to come out.  To let you know how small of a hole I used, the first one I cut was so small the chocolate couldn't even squeeze through, so I made the hole just a teeny bit bigger.

Squeeze the melted chocolate into horizontal and then vertical lines across the peanuts to make a grid.  At first, I tried making individual lines, but that was very time consuming and it didn't seem to be as smooth as I wanted it.  I tried moving faster and just making curves at the end of the line and my chocolate worked better.  The connected lines didn't take away from the design.


Once the chocolate lines dry, they are ready to serve.  They do not have to be refrigerated, but if you leave them in the sun, they will melt.

I put mine on serving dishes and sprinkled on some roasted peanuts as a garnish.  They were worth the effort!


Enjoy!

Monday, May 30, 2011

Simple Elegant Cake

Do you have one of those figural cake pans and wonder what to do with it?  Or have you avoided buying one because you didn't know when you would use it?  I have a set of silicone pans, and so I came up with this idea.  It has gone over well every time I have served it.  On Mother's Day, there weren't even any crumbs left.


Besides a pan, you will need:

A white cake mix and the ingredients to make the cake, confectioner's sugar, food coloring, and the flavoring of your choice.

A note about cake mix:  I do not think that any cake mix is better than another.  I used the Pillsbury brand this time because it was the cheapest. 


Preheat your oven and prepare the cake mix as the box directs.  I like to use the "egg-whites only" version.


I have included a brief video demonstration for separating eggs, just in case you have never done that before.  
If you have, please scroll past it!


Once you have separated the yolks and the whites, you can discard the yolks.


Mix the batter according to the directions on the box.  I usually try a higher speed on the mixer for about 20 seconds at the end to make the batter more frothy.


Make sure to spray your pan very well.  I use olive oil, but any cooking spray should work.  It is important to coat the entire pan, though.  My oil usually puddles in the petals of the flower, but I really don't want my cake to stick in the pan.


Pour the cake batter in your pan.  I fill mine about 3/4 of the way to the top.


My pan is not big enough to hold the entire batter, so I put the rest in a loaf pan and bake it alongside my flower cake.  This makes a nice snack while you wait for your guests.

A note about baking times:  The suggested baking times do not usually mention a silicone pan, or the odd ratio of sizes that I use.  I usually pick the least amount of time and check with a toothpick to see if they are done.


They're finished!


You will find that the cake rises over the top of the pan as it cooks.  You can fix this in one of two ways.  You could use a bread knife and slice off the excess.  This would work well if you have limited time and must serve your cake warm (which does taste good).  I choose to take more time and flatten mine.


While the cake is still hot, cover it with a clean dishtowel.  (A non-terry cloth one would be best.)  Then, put a plate with a flat bottom on top of the towel, and finally, something heavy, like a large glass mixing bowl.  Let the cake cool with the weight on top.


After the cake is cool and the top is flat, you could go ahead and put it on a plate.  However, I find that the cake comes out of the pan more easily if it has been refrigerated.  Cover your cake with plastic wrap and refrigerate it for a few hours.


Then, turn it over onto your serving dish.


Carefully remove the pan.  I must confess that this is the first time mine has ever come out with nothing stuck to the pan.  That is why I think the extra oil and refrigeration are important.  Each time I tried it that way, my cake looked nicer than my previous attempts.  If some of your petals do stick to the pan, gently pull them off and place them where they should have gone on the cake.  No one will notice, and your cake will still taste fantastic.


Now, for the best part.  The glaze will change a simple cake mix into a special dessert.  


You will need 1 1/2 cups of confectioner's sugar, and 1/3 cup of water to start.

Mix the water and sugar together until all of the sugar is dissolved.  The glaze should have a very watery consistency.  If you would like, you could add flavoring at this point.  I use almond extract, but you could try orange, strawberry, peppermint or anything else that you like.  With the almond flavoring, you need 3/4 to 1 teaspoon of flavoring, depending on how strong a taste you prefer.

Once you have stirred in your flavoring, separate three tablespoons of the glaze into a small bowl, and mix in 1 drop of yellow food coloring.


Add three drops of red to the remaining glaze and stir.


Now, spoon the yellow glaze over the center of the flower.  You will want your glaze to puddle in the indentations of the top of the cake.


Next, spoon the pink glaze over the rest of the flower.  Be careful not to get it in the yellow glaze.


If you let your cake sit for 30 minutes to an hour, the glaze will soak into the cake a little bit, and the sugar will crystalize a little bit on the top.  I prefer my cakes to look that way, but you could glaze them at the last minute if you want them to look like the picture above.

This is a view after sitting for about 40 minutes.


Of course, the best part of a cake is eating it.  ENJOY!


Editor's note:  This cake is just a suggestion.  You could experiment with any shape pan, any flavoring, and other colors.  Happy Eating!