Search This Blog

Saturday, January 26, 2013

Best Chicken Ever

I hope you had a great Saturday!

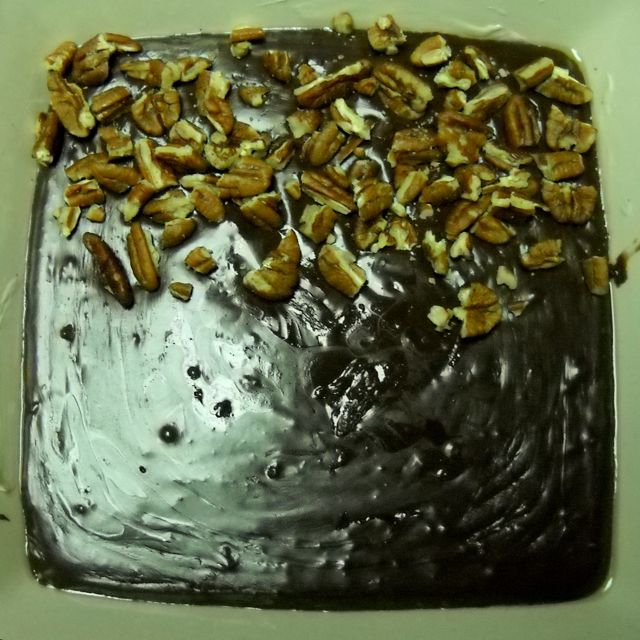
I'm still working on getting ready for our game night, but in the meantime, I needed to make lunch for a family we know.  I made the Best Chicken Ever, green beans, and this cake that I shared previously. 

Even if you are not the best cook ever, like my grandmother, it is nice if you have at least one meal that you know you can cook for guests and it will be fantastic.  These are some of my go to recipes.  My husband says these are the best green beans ever.  I got the recipe from Publix Aprons Simple Meals, and so you can easily get it here, on their website.  The only things I do differently are to make a much larger batch (as in, the recipe calls for 12 oz. of green beans and my husband and I can easily eat a pound by ourselves, as these are so good) and I add 2-3 times as much bacon as the recipe calls for--doesn't bacon make everything better?

Now for the chicken. 

I learned the real secret of this chicken about seven years ago from my fantastic friend, Holly.  She has a similar recipe that she made once while I was visiting.  The secret to good chicken (and many other things) is patience.  It really doesn't matter if you have the freshest herbs, or the best oil, or expensive chicken.  To be really good, you need to cook it on a very low temperature for a very looooonnnnnnggggg time.  I'm serious.  I cook mine for 11-12 hours at 200 degrees.  It should also be covered.  I happen to have a stoneware casserole dish and the rectangular lid/bowl from Pampered Chef that I use.  (I bought them years ago when I wasn't married and had money.)  You could use a much cheaper version of casserole dish and tin foil or something similar.  

To make this chicken, you will need:

1 whole chicken (or 2, or a turkey--it's versatile!)
Olive oil
Salt
Pepper (I used a VERY light sprinkling of Chipotle pepper instead of black)
Any herbs you like--I used tons of rosemary, some thyme, oregano, garlic powder, and minced onions this time.  I've also used basil and italian seasoning in the past.

Rinse the chicken and discard the bag of "extras."

Place in your dish (I always put mine in so the legs are on top) and pour olive oil on the chicken.  Use a bit more than a drizzle, but don't douse it in oil.  I try to just leave a thin film of oil on the surface of the chicken.  Then sprinkle on the salt, pepper, and your choice of herbs (you really can choose whatever you like).  I use enough herbs to cover the top of the chicken.  I think of it as a crust for the chicken.

Then, just put it in the oven on a low heat (like 200 degrees Fahrenheit) for at least 8 hours.  To get a nicely browned skin, take the lid off and increase the temperature (try 300) for the last 30 minutes to an hour of cooking.  

Every time I have served this, my guests loved it.  A few things I have learned, though, are these--if you cook two chickens at once, which is twice as much yumminess, it makes a ton of juice, and you want to be careful of overflowing your dish.  Also, it is best to serve the bird in the dish you cooked it in, because as soon as you touch it with a fork, it will fall to pieces.  No one has ever complained about the presentation.  They are too busy asking for seconds ;)

I hope you'll try this chicken.  It is worth the effort.  If you do try it, leave a comment and tell me how it went!

Sunday, January 6, 2013

It's Been Too Long...

Hello out there!

I have missed working on this blog, but so much has happened in the past year, I just couldn't keep up with it.  I don't know if I can now, but I'd like to try.

In the past year, I got a new full-time position at work and Tommy and I welcomed a fantastic new addition to our family.  He is 9 weeks old now, and is recovering from the flu.  I am typing this as he sleeps peacefully on my chest.  If I put him down, he will wake up.  He has learned to go to sleep in his cradle or crib by himself, but I'm just not ready to put him down yet.

I felt pretty awful for most of the pregnancy (pretty much from day 1).  I didn't do much of anything creative for the entire time.  I did make my husband an iPad sleeve, and I creatively wrapped a bridal shower gift for my sister, but I didn't have the energy to even write about that.  Perhaps another time.  Most of the time, we were lucky to get dinner made before it was time to go to bed.  After the baby--well, recovery and baby care is quite a time-eater.  I still don't have the baby's room done, but he doesn't know that.  He just knows that I'm his mommy and I love him.  I hope to be able to share cool creative stuff that I do for him with you, but I'm also working on getting that worked out.

For today, this is what I have to offer.

I made several Christmas gifts using ideas from Pinterest (Looking at Pinterest requires little or no effort. Actually doing the things you pin does.  I haven't made too much progress on that.)  The only way I got those gifts done was to have my sister come over (on Christmas Eve, no less) and hold the baby.  I would work on the presents while he slept in her arms, and she would work on them while I fed him and got him back to sleep.  Actually, I just finished two more gifts yesterday (I know, it's late), and I have two more to make.  I want to show you what I did, but that will have to wait a bit longer.

I will tell you about this cool site I found while reading a message board.  It's http://www.thistothat.com/.  I used it to find out what adhesive to use for one of my projects.  You just pick the things you want to adhere from pull-down menus, and it recommends a product.  I chose fabric to metal and it recommended 3M 77.  I found it at Walmart, and I love it.  I told my husband that it was so fun I wanted to buy more stuff to glue.

So check out thistothat.com, and maybe some 3M 77 (but mind the fumes!)

Also, as I have been cleaning, and spending a lot of time at home with the baby, I realized that I wanted to have people over, but I needed to plan simple things, like hot chocolate parties (I think I got that from Randi over at Dukes and Duchesses.  She's always having people for simple parties.)  So I have decided to host a game night when everyone is flu-free around here.

I'm going to invite people for games, and ask them to bring an appetizer to share.  We'll provide the games and sundae bar.  Once the plans are set, I'll share it with you--to get your creativity going.

You don't have to be fancy, just do something!

Wednesday, February 22, 2012

Muddy Buddies (My Version)

Have you heard of Muddy Buddies?  
I hadn't.  

My mother-in-law got the recipe off of a Chex cereal box long ago.  A few weeks before the Superbowl, my husband explained to me that Muddy Buddies were a tradition that I should keep.  He explained what they were, but I misunderstood his description.  They are supposed to be made with Chex or Crispix cereal.  I thought he said Chex Mix. 

I went to the store, and in the potato chip aisle, they had bags of Chex Mix in several different flavors buy one, get one free!  I picked the Caramel and Vanilla flavors.  When I got home, Tommy told me that I was just supposed to get the cereal.  So, we had Muddy Buddies with a twist.

The recipe for Muddy Buddies is HERE.  Try it, really.  Instead of the 9 cups of Chex cereal, I used 8 cups of Chex Mix.  I followed the rest of the recipe.  Tommy said he prefers the original, but I liked the added pretzels and such.  It kind of added a little salty flavor to the sweet.

I added the melted chocolate and stirred (this part took the longest).

Then, I put the powdered sugar in a gallon zip-top bag, and added the chocolate and cereal mixture.   Then, I just had to shake it up.  I had to add more sugar, but when it was done, I just poured it out on wax paper.  The recipe said to let the chocolate cool, or dry.  We were actually able to start snacking right away. 

I can tell you that these taste really good, and they really are ready in 15 minutes.  I started them after the game began, and they were ready before Half-time (I am a really last-minute person).  If you've never made them, this would be a great weekend snack or party food!


Enjoy!

Monday, February 13, 2012

Happy Valentine's Day!


About a month ago on Pinterest, I found some really cute Valentine's Day ideas.  I wanted to make this garland:


Isn't it adorable?

Then I found this one, which I thought was even better:


I happened to have some red felt, and so I got to work.  I followed the steps for the open hearts just like they appear.  For the solid hearts, I decided to combine them with the open hearts.  I used white embroidery floss and went to work stringing them.  For my garland, I decided to sew through the solid hearts from side to side, instead of top to bottom like the original. 

I used the white embroidery thread and strung my solid and open hearts in an alternating pattern.  I left an inch or two between each heart, and I tied a knot in the thread between each one, just in case they decided to slide around.  I did sew through the open hearts at a higher point, so my thread goes through the middle point as well. 

After I had the garland strung, I thought I would add white buttons for  embellishment.  I think the buttons finished it off nicely.  Well chosen details are important!  I tried using red and white embroidery floss to sew on the buttons, and I think I prefer the red.  You could try pink, too!  One note about sewing on the buttons--embroidery floss comes with six strands of thread all wound together.  I use the full six threads when I sew something, and it makes a really "full" looking seam in no time.  I only went through the button holes once on each heart, in an X shape, and I was done. 

I ended up giving two garlands as gifts, and they were well received.  I strung the one that I kept for myself on my computer at work, and the worst part is that I think I have to take it down after Valentine's.  I really liked this project.  Wouldn't it be a cute thing for your kids to wake up to on Valentine's day?

On a side note, my new job is going really well.  I have a great work environment, and it has actually been good for our photography business, too.  Unfortunately, it doesn't leave much time for blogging.  I hope you will bear with me as I try to do both, and let's enjoy the time we do have together here!

What special ideas do you have for your Valentine?

Monday, January 23, 2012

A Party Post

Well, I told you I would tell you all about our party.  We had it just before Christmas, but other than the food and my Christmas decorations, it wasn't really a holiday party.  You could plan a similar party for any time of the year, which is why this is a perfect time to share it with you.

A little history:

The first time we did a holiday party, I hosted an ornament exchange.  Lots of fun, but afterwards, I found out that a lot of older people don't put up Christmas trees, so the ornament exchange wasn't useful to them. Last year, we did a recipe exchange and made a little cookbook up for everyone.

This year, we had several people going through tough times.  I needed an idea that would keep the budget low, and I wanted to focus on bringing people together, and encouraging people.  I borrowed some of the ideas from the wonderful Ladies' Days hosted in the past by the church of Christ at Glen Springs Road.

This party is what I came up with.

Several friends pitched in, and we served a buffet lunch with chicken salad sandwiches, fruit salad, pasta salad, a Jimmy Carter cheese ring, carrots and ranch, pickles, olives, a peanut butter cheese ball (recipe HERE), a cookie Christmas tree, the marshmallow snowmen from my last post, a cake, tea, and apple cider.

I really wanted to draw people together, and so I tried to design the activities for the party to focus on interacting with others, getting to know people better, and sharing.

Before the party, I had each woman write out one or two of their favorite Bible verses or inspirational sayings.  I typed them up and printed pages with enough copies of each verse/saying for every woman at the party.  When the ladies arrived, I had them use decorative scissors to cut their sayings into strips.  (Side note:  this was difficult for for some people that had never used decorative scissors or had trouble with their eyes.  Regular scissors were easier for them.)

After lunch, each lady decorated a jar (with a lid).  I put out fabric, scrapbook papers, ribbons, and glue guns for the decorating.

Then, the ladies exchanged copies of their sayings.  I wanted them to trade the sayings themselves, because I was trying to encourage interaction/sharing/togetherness.

After all of the crafty fun, we played two games.  The first was a purse scavenger hunt.  The ladies divided into teams of four, and they had 10 minutes to dig through their purses to find as many things on the list as possible.  I was impressed at how much fun everyone seemed to have looking for things.  I actually had my wonderful husband make the final list for the scavenger hunt, which you can find HERE.  You can go HERE for the list that we used as inspiration.

Earlier, I said that I had each guest fill out a questionnaire about herself before coming to the party.  I took those answers and made them into four line poems about each woman--without their name.  For the next game, everyone received a printout of the poems and had to guess who the subject of each poem was.  This ended up being really difficult for some, but funny as each woman tried to guess the answers--and tried to trick the other ladies in the room into revealing things about themselves to give away the answers.  THIS is the questionnaire that I asked everyone to complete.

We had some great prizes donated for the party.  Since they were bigger items, I used them as door prizes.  We printed up tickets, and everyone received one ticket for coming.  I gave more tickets to the game winners.  Then, we did a drawing for the prizes at the end.

Everyone seemed to have a good time, and we plan to have another party soon.  I hope you can use some of these ideas for your next gathering.

Wednesday, December 28, 2011

Snowmen!


Aren't these little guys adorable?  Today, I'm going to show you how to make them--just in time for the cold weather and a New Year's Party!!!!


We had a fairly warm Christmas.  It finally cooled off yesterday, and today we started out in the 30's.  Welcome to Florida.  I made these little darlings for our 3rd Annual Ladies' Gathering that we had at my house the weekend before Christmas.  The party focused on growing closer together and building one another up.  My next post will be about that day.  But now, to make these snowmen while the weather is appropriate:

 Supplies:  Jet-Puffed Marshmallows, Rollos (with wrappers removed), Chocolate Candy Melts (or Milk Chocolate chips), toothpicks, and round chocolate cookies.


*If you have a piping bag, or a bag for decorating candy, those work best.  If you do not, a plastic sandwich bag will work, too.  Just don't squeeze it too hard.  
*I use the chocolate Oreo cookies, but any round chocolate cookie would work.  I think the Grasshopper cookies would be great for this, but not everyone in my family appreciates the combination of mint and chocolate...
*For the toothpicks, You will want to cut your toothpicks in thirds (I used kitchen shears for this) and use the two end pieces.  I threw the middles away.  Last year, I only had natural wood color toothpicks, and I dyed them orange with food coloring.  It worked quite well.  This year, however, my husband went to buy me some toothpicks, and the only ones the store had were already colored.  Just use what you have!


1.  Cover your workspace with wax paper, and pick out your marshmallows.  Something I learned the hard way--try to pick out the marshmallows that are not as smushed from being in the bag.  they need to be as flat and level as possible so they will stand up.  I had about 30 Oreos, so I needed 30 marshmallows and 30 Rollos (unwrapped).  


2.  Melt your chocolate.  Put some in a decorating bag or sandwich bag and heat them in the microwave.  There are directions for this on the bag of candy melts.  If you use chocolate chips instead, make sure you heat on 40% power.  Heat for 1 minute, and knead the bag.  If the chocolate isn't fully melted, keep heating and kneading at 30 second intervals.  Clip off the tip of the decorating bag (or corner of the sandwich bag) to allow a small amount of chocolate to come out.  The hole should be about 1/8 inch in diameter.


3.  Assemble your hats.  Squeeze a mound of chocolate onto the middle of an Oreo, and then stick a Rollo in the chocolate. Voila!  Your very own chocolate top hat!


*Make sure you are generous with your melted chocolate.  It is the glue that holds everything together.  Also, make sure that you allow for time for the chocolate to harden before you handle the pieces.  By the time I had assembled 30 hats, the first ones I had done were ready for the next step.


4.  Use an even more generous amount of chocolate on top of each marshmallow, and place a hat on top of each.


*If the chocolate doesn't squeeze out as well as you would like, try reheating it for 30 seconds (at 40% power) and see if that helps.
My assembly line.  

5.  After allowing time for the chocolate "glue" to harden, hold each snowman by the cookie (not the Rollo, it will melt on your hands) and pipe 2 eyes and little dots for the mouths.  


*Making sure that the chocolate is warm helps to make the eyes and mouths go better.  
*Holding the piping bag to the side and making the dots with a sideways motion seemed to work better than up-and-down.
*Keeping the tip of the bag clean makes for a better finished product.  If it starts to get chocolate stuck to the outside of it, just  wipe the tip with a napkin or paper towel.


6.  Add the noses.  

Enjoy!!!!!

These snowmen are so easy to make.  As long as an adult did the piping, you could easily allow children to help assemble these little guys.  You could make them a day or two ahead if you needed to, although the Oreos get soft.  These have been a hit with everyone that has seen them.  I serve them at our Christmas party, but then I have leftovers, so I usually wrap them individually and deliver them to co-workers and others, and they love them.  

I hope you'll try these!  They're really easy and have a big impact on your dessert table.

Happy New Year!

Monday, December 12, 2011

Fonts for Everyone AND For Beginning Scrapbookers-The Importance of Matting

Are you getting ready for Christmas?  Our tree is up, and we got our outside lights up.  This Saturday, I am having the ladies from church over for our 3rd Annual Ladies' Gathering.  Two years ago, we had an ornament exchange, and last year we all contributed recipes for a cookbook.  This year, we are going to focus on growing together and building one another up.  I think it's going to be great.  You'll get to read all about it soon.  Also, I am going to make my marshmallow snowmen again this year, and that will be next week's post.
In June, my husband and I started our own business, Redding Creative Arts.  We offer photography and scrapbooking services to our customers.  I have gotten a couple of very large scrapbooking orders lately, and while I can't give away all of my trade secrets, I wanted to take a moment to share some things that are very simple that have a huge impact.  

The first thing I want to tell you about is a really great website with down-loadable fonts for scrapbooking, card-making, and whatever other things you might want to type:)  KevinandAmanda.com is a blog that has links to free scrapbooking fonts, and Fonts for Peas!  The free handwriting fonts section is where I got the font for the Happy Birthday title later in the post, as well as the labels for my pictures.  These are adorable, and I am so excited to tell you about them!  You can click on the buttons below to go and take a look around.


I get the cutest handwriting fonts at Fonts for Peas! kevinandamanda.com/fonts
I get the cutest scrapbooking fonts at Free Scrapbook Fonts! kevinandamanda.com/fonts


When I first started scrapbooking, I was awed by the number of products available, and overwhelmed by the expense of some of them.  I have learned to buy paper when it's on sale, but for awhile, the thought of using extra paper made me worry about how much money I was spending.  After reading many magazines, and seeing the results myself, I have decided it is worth the the expense to use the extra paper (and if you buy it on sale, it's okay,... right?)

Sometimes, it seems like pictures get lost on the paper when you scrapbook them.  Matting helps to keep this from happening.  It gives your picture emphasis with a little "frame." The frame helps to guide your eye to the item you want to emphasize, and kind of forces the background paper to stay in the background.  


Even with all of the scrapbooking I have done, I still have to remind myself that matting is important.  If I don't use a mat, it seems like something is missing, and I usually end up adding one.

Another example with solid colors:
 Sometimes, if you have an extra-busy background, it seems like a picture still gets lost, even with a mat.
How about a double mat?  Quick, easy--and great results.  Just use contrasting colors!

 I love using mats.  They are probably the easiest thing you can do for impact on your pages.  If you are using a solid color background page, you could use a patterned paper for the mat.  Also, if you are double-matting your photos on a patterned background, you can use a different patterned paper in matching colors for your top mat. (I don't have a specific picture of that, but you can see it on the edges of the first example photos, where I matted with striped paper on yellow to put with the flowered background.)

******To put mats on your photos, adhere your photo to your matting paper (I use photo mounting squares) and then trim your mat to fit the picture.  I find that it is easier to cut the mat if I can see where the picture is.  (Occasionally, I do get the picture slightly off center.  When that happens, I CAREFULLY lift the picture and put it back on.  If you buy the photo mounting squares labeled "initially repositionable," this is easier to do.)  If you want to double mat your photo, simply adhere the single-matted photo to another piece of paper and trim again.******

If you are thinking of trying to start a scrapbook, I hope this helps you.  I love your comments!  Do you have a favorite scrapbooking technique, or something you want to learn how to do?

Stop by next week for marshmallow snowmen!

Wednesday, November 30, 2011

A Baby Gift


A family at church is about to be blessed with their first child--a little girl.  We are so excited for them.   For her shower, I thought I would try out one of the ideas I saw on Pinterest.  {If you haven't heard of Pinterest, it is a site for finding/sharing great ideas.  I have a few invitations left on my account, if you want one, please email me :)}
I used buttons to embellish some onesies that I picked up at Wal-mart, and then I made some cute little skirts to go with them.  I originally saw THIS cute design on Pinterest.  You can see my version on the left.  I used pastel buttons for two reasons--this was for a girl, and Wal-mart was out of packages of primary colored buttons.  I did use a dark blue button for the head.

To make this, I arranged the buttons the way I wanted them, and then held one of them in place and put the others back on the table.  I used embroidery thread (DMC floss) to sew the buttons on.
You can use any type of thread.  I used the embroidery floss (this is the same thread that people use to make friendship bracelets) because it has six strands of thread together, and so it is much thicker.  You get very noticeable stitching without having to sew as much.
Just thread your needle, tie a good knot to start, and sew on your first button.  I like to make the X shape with my thread, but you could make yours parallel = if you wanted to.
Once I sewed the button on, I laid the other buttons back on the shirt to make sure that I was keeping the design I wanted.  Then I held the next one in place, picked up the other buttons and sewed on the second.  I just kept doing that until I got to the end.
After sewing on so many buttons, I found that it is easier to just keep sewing on the buttons with the same thread, rather than tying a knot after each button.
I used a backstitch with dark embroidery thread to make the little antennae.  Link for backstitch video (in case you need it--I promise, it's really easy.  If you can sew on a button, you can do this.)


The next onesie I made had a rainbow on it.  Yes, it's a rainbow.  The mother-to-be recognized it, but not everyone else has.  Take it for what it's worth.  I found this greeting card on Pinterest that had a button rainbow, and I figured if you could put it on a card, it would go on a shirt.  (That's what I keep telling you--take an idea and make it your own!)  I added pom-poms for clouds, which seems to help people identify the rainbow.  The sewing technique is the same for the buttons.  The hardest part of this one was sewing the pom-poms on.  You have to get your needle through the center of the ball so that the thread won't pull out.  It's not really that difficult, but it is harder than sewing on a button.

My third design was a candy cane.  The baby is due this month, and what baby doesn't need something cute for Christmas?


There you have it--three personalized onesies (or t-shirts) for someone special.  A nice gift without having to spend a fortune {and since I am looking for a job, I don't have a fortune:)}
I also made some little skirts to match.  This was my favorite part.  I wanted to keep them.  Really.  They are very simple, although you would probably want to use a sewing machine. 
I liked this skirt best.  Don't you want to make one now?


As this post is already rather long, I decided to try something new (for me).  I did make a tutorial for the skirts that I made, but I posted it HERE.  Please keep in mind that I write this blog with the idea that anyone can do the things that I post, even if they've never tried similar projects.  I wrote my tutorial in hopes that someone who has never sewn anything before could still follow it (although I don't know if I succeeded).

If you need a cute gift for a baby, these are great.  I hope you try them!

I love to hear from my readers, so let me know what you think!

Sunday, November 20, 2011

Happy Thanksgiving AND How to Make a Bow


Wouldn't you like a wreath like this one?                                            You can make one.  Yes, you.  I have two columns in my living/dining room, and I got enough supplies to make a wreath for each of them.  I bought the supplies several years ago, and never got around to making them.  I finally made them on Saturday, to hang at my mother-in-law's house for Thanksgiving.  Next year, they will already be made, and I can put them up in October.

I used a medium-sized grapevine wreath, a little scarecrow, 4.5 feet of wire ribbon, and some silk flowers in fall colors. I bought long stems of fall leaves, and then I took the short stems of leaves off of the long ones.  


First, I arranged the leaf stems where I thought I wanted them.  


I tried to think about a "cascade" type of arrangement.  I put the larger stems of leaves in the back, and the shorter ones toward the bottom of the circle, in the front.  I also put the lighter color leaves in the front, so that they were more noticeable. 


On the opposite side of the circle, I arranged two small bouquets of fall flowers, and put one slightly lower than the other.  I also positioned my scarecrow in front of the flowers.

At this point, look at your wreath.  Do you like the placement of your components?  If not, this is the time to shift them around.  If you do like the way your wreath looks, then it's time to secure your leaves and  flowers.


I like the idea of being able to redo these wreaths if I get tired of them, and sometimes a glue gun can be messy.  To secure the stems and scarecrow to the wreath, I used craft/beading wire.  I cut a long piece and wrapped one end around the leaf stems and a grapevine stem, and when it was tight, I cut the long tail off.  I used craft wire through the loops of the scarecrow's overall straps (in the back) and wired him on, too.
 Next, I added the bow.  My aunt showed me how to make a beautiful small bow, and I modified that technique for a large bow.  I made a video for you, showing you how to make the bow.  Watch below!

This is the bow that I made on the video.  If it doesn't look as perfect as you want it to, just keep rounding out the loops and straightening the tails.  These bows are quick and easy, and they look great.


I put craft wire through the back of the bow and then used the wire to secure the bow to the wreath where I wanted to place it.  
I used craft wire to make a hoop on the back of the wreath to hang it.

Here it is:


I hope you all have a great holiday and enjoy time with your families and loved ones!

Tuesday, November 15, 2011

Anyone Can Make Faux Fudge!

Are you getting ready for all of that holiday baking?  Today, I am going to show you a recipe that I have been using for years.  It is quick, easy, and versatile.   No candy thermometer necessary! 

I was reading a Family Circle magazine and came across this reader tip:
So easy, right?

I thought I could do it, but I also thought I could do better.  This is how I make my "Faux Fudge."

The base recipe has a bag of chocolate chips, a can of frosting, 1-2 cups of marshmallows, and 1 tablespoon of butter.  Of course, the nuts are optional.  (I didn't use the whole bag.)
To start, use a non-stick pan and a spatula.  I love the silicon ones, because they don't melt.  I have a whole collection, and I use them for everything.  
 On medium heat, melt the butter in the bottom of your pan.  I use the butter to help with melting the marshmallows, so you don't need a lot.
Once the butter is melted, stir in your marshmallows.  If you don't think there are enough in the pan, you can always add more.  I used about 2 cups.  One of the best things about this recipe is its versatility and forgiving nature, so if you add more of something, it just makes it better.
Once the marshmallows have melted, you have to be more careful with your stirring and melting.  Stir in a can of cake icing.  It will melt and mix with the marshmallows very easily and quickly. 
Next, you will add the chips.  The chips do not melt as easily as the icing does, and you will have to stir a lot more.  Once you start adding the chocolate, if you don't stir enough, the mixture can get too hot and it will burn.  (After many times of doing this, I can tell you, you can smell it burning before the fudge will taste burnt.  IF it starts to smell burned, take the pan off the heat for a minute and stir, stir, stir--then put it back on the burner and keep stirring and melting.  Everything will be fine.)
The fudge will change consistency from stiff and lumpy to smooth very quickly.  When the mixture is melted and smooth, remove it from the heat and pour it into a greased baking dish.  You don't have to grease the pan, but it works much better.  Also, I have tried lining the dish with wax paper beforehand.  I don't recommend that, as the fudge just sticks to the paper. 
If you want to top the fudge with nuts, do it right after you pour it in the baking dish.  If you wait five minutes, the nuts will not stick as well.  I made this fudge to take on a picnic, and I wasn't sure if everyone liked nuts, so I only covered half of the fudge.
Put the fudge in the refrigerator for at least two hours.  I usually leave mine in overnight.  

For cutting:  I have found that it is a lot easier to cut if you take the fudge out of the refrigerator a few hours before you serve it.  If it is room temperature, you can cut it with a butter knife.  If it is cold, you will have to work much harder.

Now, let's talk about ways that I have changed this recipe.  The original suggested peanut butter chips.  I love peanut butter and chocolate, and I tried it.  I liked it.  Chips are expensive.  Eventually, I just started stirring about 1/2 to 3/4 of a cup of peanut butter in with the can of icing.  It works the same way, and is  cheaper.  

When Tommy and I first started dating, I wanted to make him something special for Valentine's Day.  He loves coffee, so I experimented with espresso flavored fudge.  I don't like coffee, but I like this.  I had  to make several attempts, but I finally got it right.  I went to Starbucks and bought a shot of espresso.  Stir the prepared espresso into the fudge after the chips begin to melt.  This one is a little bit more tricky than the rest.  If you add more than one shot, the fudge won't harden.  Also, the coffee will burn more easily than the chocolate, so you definitely want to stir it in last.  

Other things I have added are almond, peppermint, or orange extract.  Just use teaspoon or so, and stir it in just before you remove it from the heat.  Any extract/flavoring would work.  I have also tried mixing butterscotch chips in with the chocolate.  While I have not tried this one, I think that Andes Mints would be a great addition here!

Thanks to Lynette for helping me embark on this fudgy adventure!  

I'd love to hear from you!