Aren't these little guys adorable? Today, I'm going to show you how to make them--just in time for the cold weather and a New Year's Party!!!!
We had a fairly warm Christmas. It finally cooled off yesterday, and today we started out in the 30's. Welcome to Florida. I made these little darlings for our 3rd Annual Ladies' Gathering that we had at my house the weekend before Christmas. The party focused on growing closer together and building one another up. My next post will be about that day. But now, to make these snowmen while the weather is appropriate:
 Supplies: Jet-Puffed Marshmallows, Rollos (with wrappers removed), Chocolate Candy Melts (or Milk Chocolate chips), toothpicks, and round chocolate cookies.
*If you have a piping bag, or a bag for decorating candy, those work best. If you do not, a plastic sandwich bag will work, too. Just don't squeeze it too hard.
*I use the chocolate Oreo cookies, but any round chocolate cookie would work. I think the Grasshopper cookies would be great for this, but not everyone in my family appreciates the combination of mint and chocolate...
*For the toothpicks, You will want to cut your toothpicks in thirds (I used kitchen shears for this) and use the two end pieces. I threw the middles away. Last year, I only had natural wood color toothpicks, and I dyed them orange with food coloring. It worked quite well. This year, however, my husband went to buy me some toothpicks, and the only ones the store had were already colored. Just use what you have!
1. Cover your workspace with wax paper, and pick out your marshmallows. Something I learned the hard way--try to pick out the marshmallows that are not as smushed from being in the bag. they need to be as flat and level as possible so they will stand up. I had about 30 Oreos, so I needed 30 marshmallows and 30 Rollos (unwrapped).
2. Melt your chocolate. Put some in a decorating bag or sandwich bag and heat them in the microwave. There are directions for this on the bag of candy melts. If you use chocolate chips instead, make sure you heat on 40% power. Heat for 1 minute, and knead the bag. If the chocolate isn't fully melted, keep heating and kneading at 30 second intervals. Clip off the tip of the decorating bag (or corner of the sandwich bag) to allow a small amount of chocolate to come out. The hole should be about 1/8 inch in diameter.

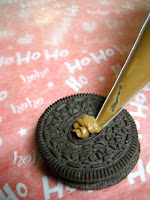
 3. Assemble your hats. Squeeze a mound of chocolate onto the middle of an Oreo, and then stick a Rollo in the chocolate. Voila! Your very own chocolate top hat!
*Make sure you are generous with your melted chocolate. It is the glue that holds everything together. Also, make sure that you allow for time for the chocolate to harden before you handle the pieces. By the time I had assembled 30 hats, the first ones I had done were ready for the next step.

 4. Use an even more generous amount of chocolate on top of each marshmallow, and place a hat on top of each.
*If the chocolate doesn't squeeze out as well as you would like, try reheating it for 30 seconds (at 40% power) and see if that helps.
My assembly line.
 5. After allowing time for the chocolate "glue" to harden, hold each snowman by the cookie (not the Rollo, it will melt on your hands) and pipe 2 eyes and little dots for the mouths.
 *Making sure that the chocolate is warm helps to make the eyes and mouths go better.
*Holding the piping bag to the side and making the dots with a sideways motion seemed to work better than up-and-down.
*Keeping the tip of the bag clean makes for a better finished product. If it starts to get chocolate stuck to the outside of it, just wipe the tip with a napkin or paper towel.

 6. Add the noses.
 Enjoy!!!!!
These snowmen are so easy to make. As long as an adult did the piping, you could easily allow children to help assemble these little guys. You could make them a day or two ahead if you needed to, although the Oreos get soft. These have been a hit with everyone that has seen them. I serve them at our Christmas party, but then I have leftovers, so I usually wrap them individually and deliver them to co-workers and others, and they love them.
I hope you'll try these! They're really easy and have a big impact on your dessert table.
Happy New Year!


